carpal tunnel

Registered: 20/12/1999
Posts: 31636
Loc: Seattle, WA
|
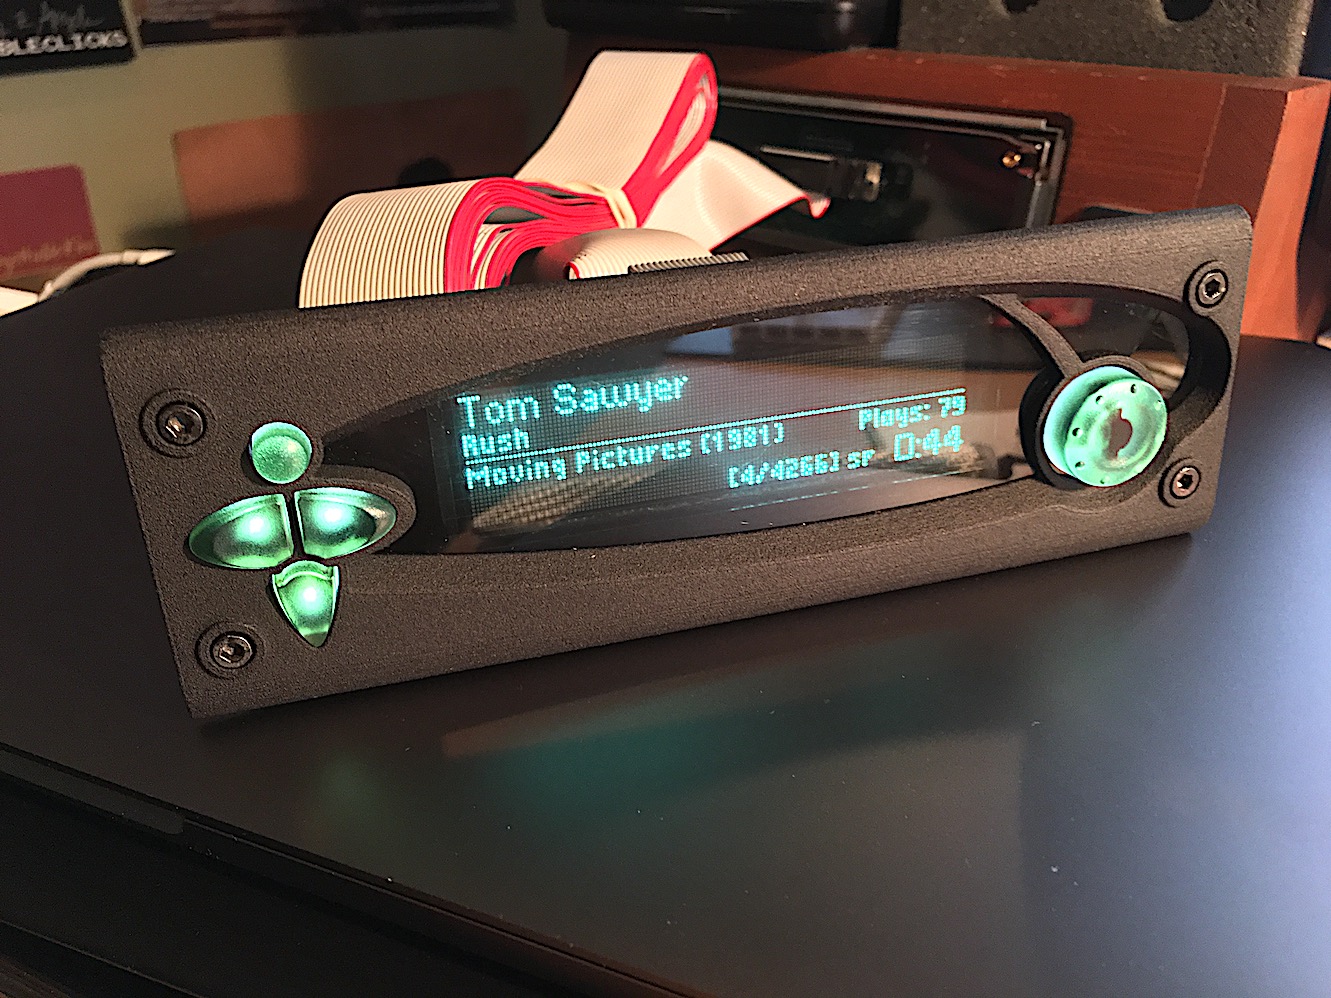
Attached are the final 3D models for my custom fascia for Rio Car and empeg Car mk2/2a.  Notes: - These are intended to be printed at Shapeways with the "strong and flexible black plastic" printing option.
- These are specifically for the purpose of custom mounting of the empeg display, using the Eutronix Display Extender, without a pull handle.
- However, you are free to modify these for your own uses, upload them to Shapeways yourself, and print the new versions.
- These are deliberately designed to be narrower than the original fascia, i.e., without the "ears" prodtruding above the handle.
- Because the "ears" are gone on these fascias, any lens that you use will also need to have its ears carefully trimmed off in order to work as expected. Be careful not to crack your lens when trimming it: I recommend either a dremel tool cutting disc at low speed, or careful repeated scoring with an X-acto blade until it separates easily.
- I have provided two versions, one with a rounded edge and one with a flat/squared edge. The flat one is meant so that you can take the source file and then modify it to easily add your own custom mounting points around the edges, and/or to change the shape and size of the outer edge to meet your needs and desires for your particular custom installation.
- If you edit these yourself, open the attached ".blend" files in the 3D editing program Blender.
- If you edit these yourself and then print them at Shapeways, make sure to re-export the files as "STL" files for uploading to Shapeways.
- When uploading the STL files to Shapeways, I have noticed that their importer gives me guff about the size of the model, displaying an error message box. It does print them at the correct size though. Before printing, double check that the message says the correct expected size. In my case, the message said "we scaled your model using the meter scale, now your model at 6.68 x 2.265 x 0.236 inches, or 16.968 x 5.754 x 0.6 cm can be printed", which is the correct dimensions for my version of the models.
- The size and fit of the holes for the left/right buttons are very tricky. If the button holes are too big, the buttons fall out, and if they are too small, the buttons "stick" and you can't press them. I have sized these holes to perfectly match and fit my translucent custom colored button set, but your button set may be different. In particular, I have found that the original factory gray buttons are a hair larger than the translucent custom colored buttons, and might stick a bit. If that happens, trim the button holes to be a tiny bit larger using a very sharp x-acto blade. Locate the parts that need to be trimmed by sticking a button into the hole tightly, removing it, then looking very closely to see where it rubbed against the textured plastic (with the Shapeways plastic, you can tell if you look real close). Be careful not to trim too big or else the buttons will fall out.
- Remember, when reassembling, do not cinch down the fascia allen screws or the display board standoff bolts too tightly. They can strip very easily.
Blender file with curved edges: Custom Empeg Fascia - Curved Edge.blendBlender file with flat edges: Custom Empeg Fascia - Flat Edge.blendEnjoy!
|

