Attached is a panoramic photo taken from my roof. It is made up of 12 photos stitched together. I do not have any stitching software, so I stitched them manually using the freeware Paint.Net program. (BTW, thank you, Bitt, for steering me to that program when my MS Paint program died last year.) To view it you will need to download it, open it up in the viewer of your choice, zoom in until it fills the screen vertically and than scroll left and right. The panorama attached here is at 1/4 the resolution of the original photos because I didn't think anybody would appreciate a 60+ MB file (the bbs won't take one that size in any case) and besides that, my graphics editor won't let me create one that big.
There are a few weirdnesses with the panorama shot that I don't understand. For that, you will need to download the second photo (the smaller one) and open it up in some sort of graphics editor or viewer so that you can zoom in very close. Be aware that both pictures are large -- the Test Sample picture is about 700K, the Panorama shot is about 6 MB.
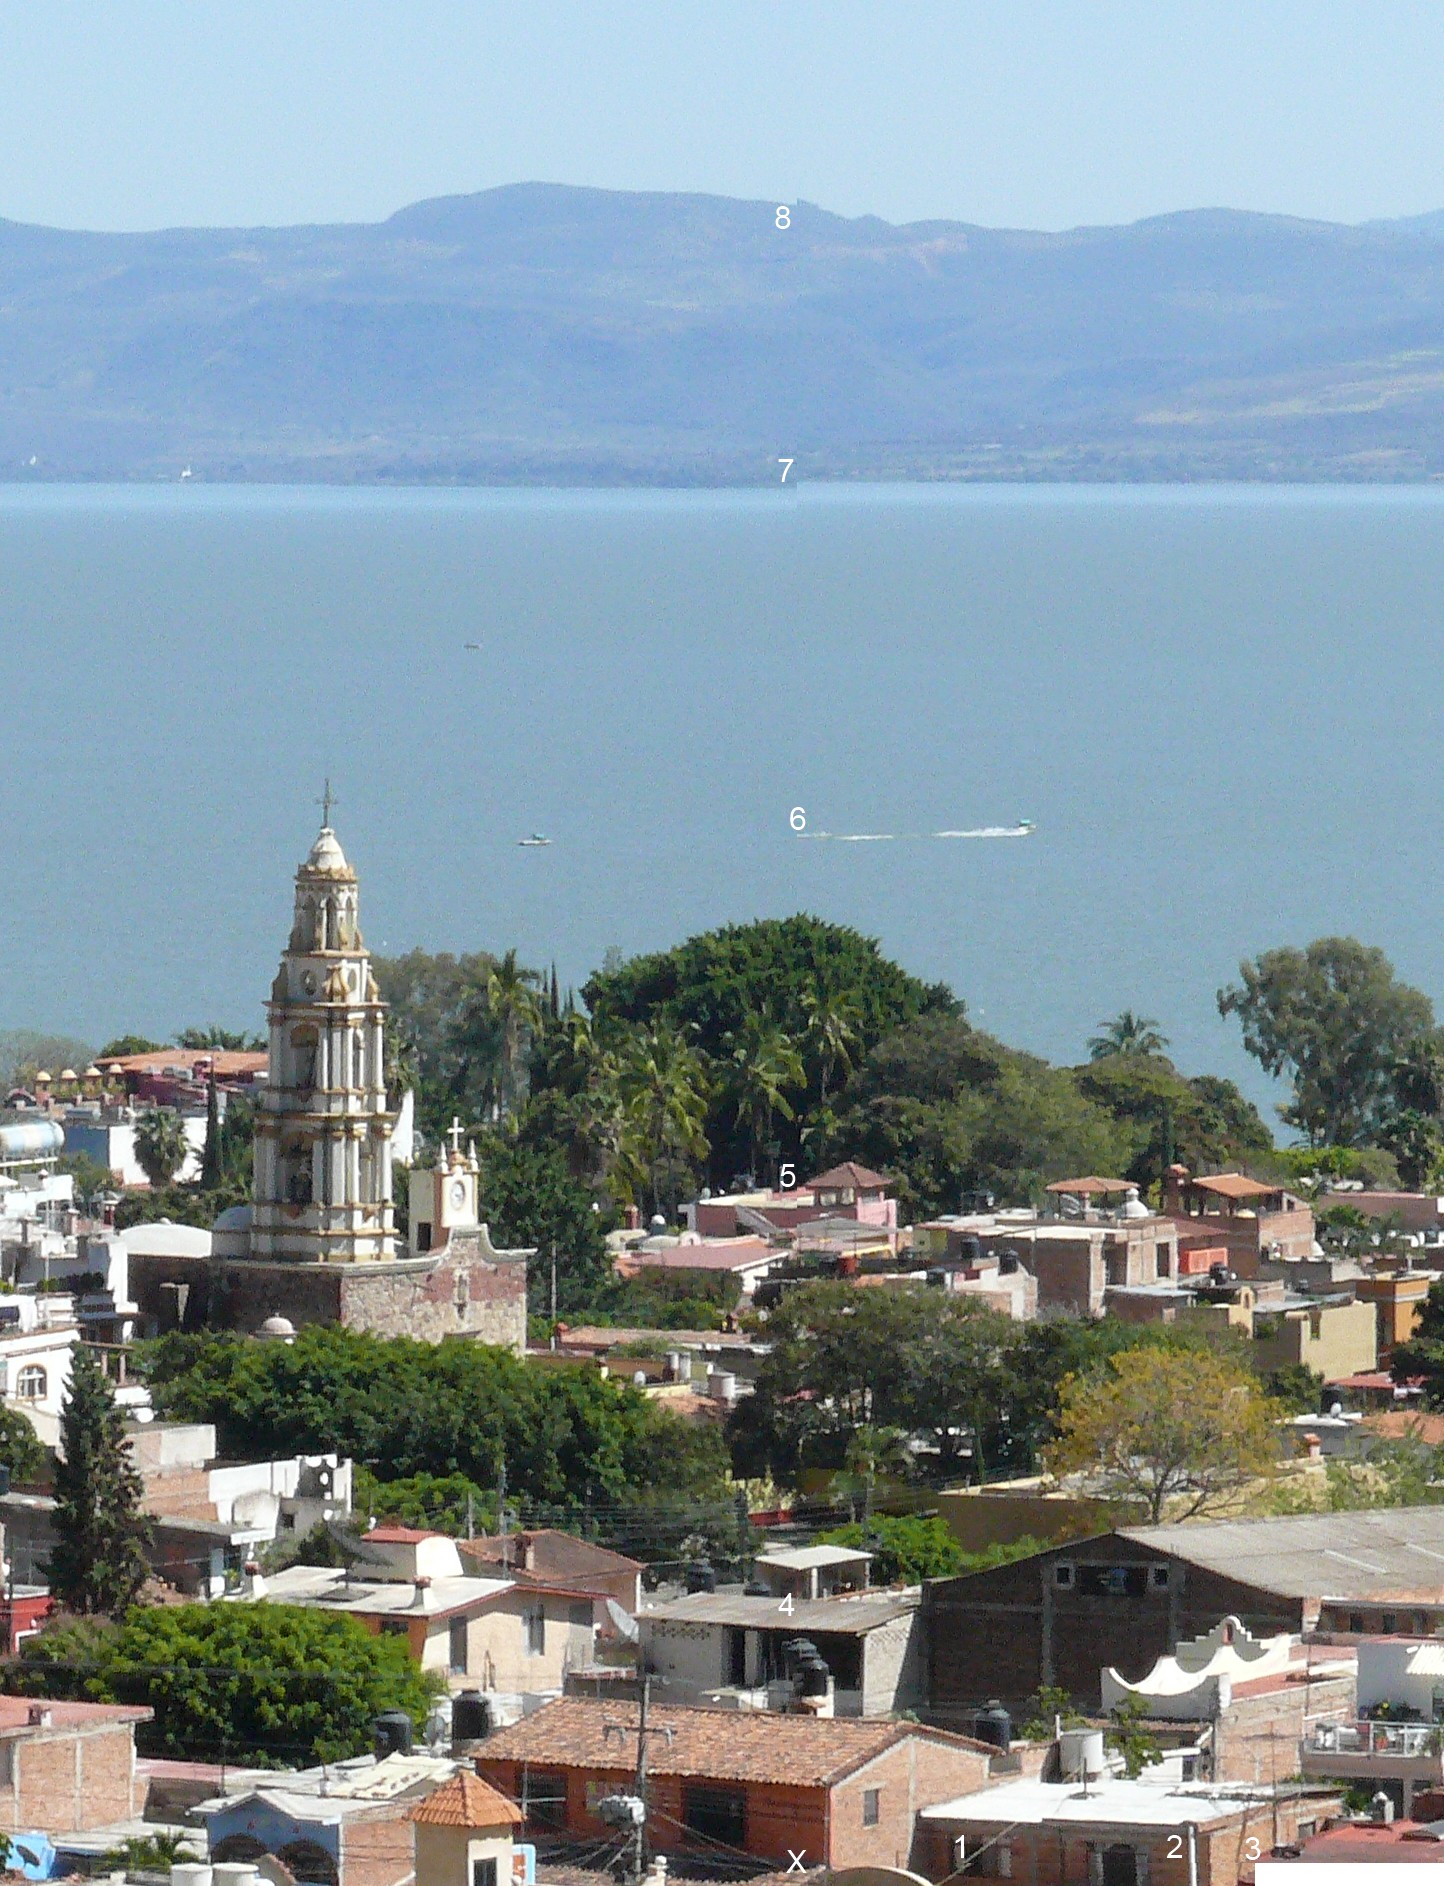
The Test Sample is two of the original high-res photos manually stitched together then cropped, with the picture on the right covering the picture on the left where they overlap. There is a white "X" on this picture denoting the exact location of the corner where the second picture was stitched to the first. Also, there are numbers on the picture from 1 through 8, indicating points of interest.
X: The corner of the join. Alignment in this immediate area is perfect, both horizontally and vertically. If you look very closely you will see a slight vertical discoloration about half a pixel wide where the two pictures are joined.
1: Only a little bit to the right, and the diagonal wire shows a serious discontinuity. If I align the wire perfectly, then many other elements become mismatched.
2: The drain pipe and the corner of the house are off by half a pixel, I understand why this occurs and that it can't be helped.
3: Each of the 11 pictures added to the original left-most picture "stair-stepped" after stitching, losing the bit off the bottom as shown here and extending the same amount higher than the one previous. My tripod has level indicators in two planes, and both were dead on. Perhaps because I was shooting at a downward angle this caused the stair stepping? I can't visualize what I needed to do to keep this from happening.
4: The roof line just beneath the "4" shows just the tiniest bit of misalignment, as does the corner of the mirador just above it. A fraction of a pixel.
5: This roofline shows a full three pixel-width jag that is not in the original (left-hand) picture.
6: This doesn't show any problem with the picture, I just thought it was interesting because to the left is the boat while it was sitting still when the left-side picture was taken, and by the time the right side picture was taken the boat had started up and is in motion. Where the boat's wake abruptly starts is the exact dividing line between the two pictures. Amusing, but not important.

7: Note the jag in the shoreline. We are now up to a seven pixel discrepancy in the alignment between the two pictures.
8: At the top of the picture, the right hand picture is a full 8 pixels higher than the left, even though at the bottom the alignment is perfect. Again, I cannot visualize what might be causing this.
So, does anyone understand this kind of photography well enough to explain to me the misalignments? How does real stitching software handle this sort of thing?
On the actual panorama shot, I aligned from the top, not the bottom as done with the high-res sample, because the misalignments are much more noticeable on the ridgetop and the shoreline than they are in the jumble of roofs and plants at the bottom.
For those who are interested (I don't know why they would be, but I love to talk about it
)the 12 shots were taken with a Panasonic DMC-50Z camera, zoomed to 114 mm (35mm equivalency). Exposure was f-11 at 1/250 second, fixed (manual) so that the camera wouldn't try and compensate for light changes as it pointed more towards the sun while panning to the right. Focus was also set manually, locked in on the near shoreline (1/3 -- 2/3 rule, although at f-11 depth of field was pretty much five feet to infinity). ISO was 200. Photos were taken with the camera on a tripod, using the self-timer to avoid vibration.
All in all, I don't think it came out too badly for my first try at a panorama.
tanstaafl.

 Previous Topic
 Index
Index
